
Puedes ver el post original en español pinchando aqui
A couple of years ago, I surprised my wife at Christmas time with this wonderful blog that you’re reading at the moment. And now she’s giving me the opportunity to write a post on how to make a delicious “roscón de reyes”.
A couple of years ago, I surprised my wife at Christmas time with this wonderful blog that you’re reading at the moment. And now she’s giving me the opportunity to write a post on how to make a delicious “roscón de reyes”.

I’ve decided to write this because I’m sure I’m
not the only one who has been through several recipes in search of an excellent
roscón, and none of them have ever been quite what I was looking for. The
recipes always claim to be “perfect!”, “ideal to make with your little ones!”, “easy
as pie!” NOT TRUE! Don’t fool yourselves, readers. Making any old roscón is
easy, sure. But making an excellent recipe requires a bit more effort.

Before we go any further, I ought to explain
that my idea of a good roscón isn’t one which is 10cm high, but can’t be
scoffed without litres of coffee or hot chocolate to wash it down for me, the
ideal roscón must be soft and spongy but firm at the same time, with just the
right amount of orange blossom oil. And with that I leave you with my
definitive recipe, which I have finally decided on after several years, tweaking
the quantities and baking time. Don’t be discouraged if it doesn’t come out
well the first 20 times, because it’ll be perfect the 21st time!
Ingredients (3
roscones):
- 850g strong flour (get a good brand)
- 200g sugar
- 100g melted unsalted butter
- 50g organic yeast (from the baker’s)
- 200ml whole milk
- 75ml orange blossom water (good brand essential)
- 75ml cognac
- 4 eggs
- Grated rind of 1 orange
- Candied fruit or almonds (to decorate)
- A pinch of salt

Kitchen Utensils:
You’ll need a large bowl (5-8L) + 2 smaller
ones (3-4L), scales, measuring cup, blender, 3 oven trays, cheese grater, and a
strong pair of hands!
Method:
First: Weigh all the ingredients. Fill a
small bowl with lukewarm water and leave to one side. In the other small bowl
pour in 100ml of lukewarm milk and rub in the yeast using your fingers until it
dissolves completely. Next add the flour bit by bit until a dough non-sticky
dough has formed (it’ll need approx. 200g of hour) Form into a ball and place
in the bowl of water you’ll see that it sinks.


Second: If there is any flour left in the
small bowl, add it to the large bowl. Add the rest of the flour and orange
rind.
Put the eggs, sugar, cognac, orange blossom
water, the remaining 100ml of milk and the pinch of salt into the blender,
Blend well. Now the read fun begins!
Gradually add the contents of the blender to
the large mixing bowl while mixing continuously by hand. Afterwards you can
enjoy getting the dough out your hair, eyes, and cupboard doors!
You’ll need a clear hand for the next step.

Make sure the ball of dough in the smaller bowl
is now floating. Remove it from the water and add small pieces of it to the
mixture in the large bowl, until you have used it all.


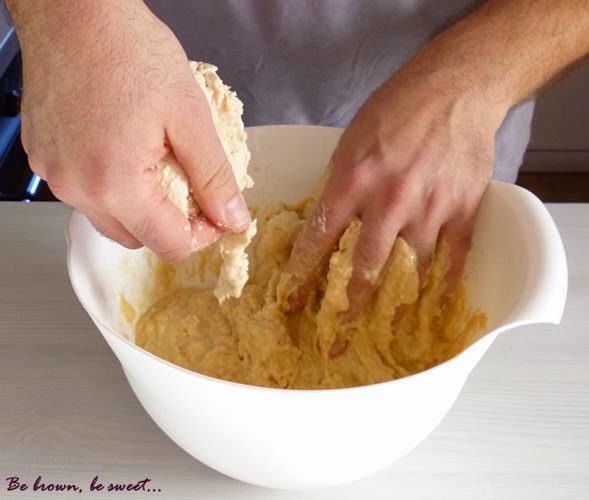
When you have managed to create stickiest dough
ever, gradually add the melted butter to the mixture. With each drop of butter
you’ll begin to feel calmer, and you may even convince yourself that you are in
control of the dough, and not the other way around. But you’re kidding
yourself.....the dough always wins!


After a very, very, very loooooong time
kneading the mixture in the bowl, you will have a dough that is between firm
and soft. You shouldn’t be able to form it into balls, nor draw crosses on it
with a knife, or any other suggestions that you’ll come across on the Internet.
Just leave it alone for 3 or 4 hours while you regain composure and get rid of
the little sticky bits all over yours kitchen!


Third: Swelling with pride at having
arrived at this point, just as the dough is swelling now that the yeast has
started working, breathes deeply and calmly.

Grease three baking trays. Get your hands well
buttered and leave the packet handy. Knead and work the dough (which will have
doubled or tripled in volume) until it returns to its original size. Grease
your hands as often as is necessary so that the dough doesn’t stick to your
fingers but NEVER add more flour.
Take approximately one third of the dough and
arrange it into a roscón. Form the best ring you can in the air (you’ll wish
you had three hands at this point) and place it on the tray. Don’t worry if it’s
not perfect as you can manipulate the shape further once you’ve got it on the
tray. Make sure you keep it in the centre of the tray and remember that it’ll double
in size. Personally I hide the figure at this point.


Repeat this stage to form the other two
roscones and leave them to prove for 4 to 6 hours.
Fourth, but no less
important: Pre-heat
the oven to 170º-180º. You’ll see that your roscones now look like proper
roscones! Now you need to beat an egg and glaze the roscón, taking care not to
flatten it. At this point the dough is extremely unstable and a heavy-handed
touch or even a draft could suddenly cause it to collapse, leaving us with a marvellous
roscón-flavoured pizza.

Decorate it with candied fruits to taste. If
you don’t like candied fruits, you can always sprinkle it with ground almonds,
or even use fruits, just for the sake of adding a touch of colour, as they can
easily be removed later.

Now take a small bowl, add some sugar and a few
drops of orange blossom water, just enough so that the sugar moistens and
hardens. Place little lumps of the sugar mixture on top of the roscón between
the candied fruits and bake for 10-12 minutes (or 15 if you like them a little
darker).


Now it’s time to let it cool and make a lovely
hot chocolate!

I hope that if you’re looking for a great roscón
recipe, this will be your favourite; and that if this is your first roscón, you’ll
find it easy to follow. Either way, if you don’t like it or it doesn’t come out
quite right, keep trying, or vary the quantities until you end up with the roscón
of your dreams.
The only thing left for me to do now it to thank
the author of this blog for allowing me to post this recipe, and encourage her
to keep going with her delicious confectionary and working on this fabulous
blog.
PS) Here you can see the video tutorial my husband made about this recipe in Spanish. We hope you like it!
PS) Here you can see the video tutorial my husband made about this recipe in Spanish. We hope you like it!
If you liked this post you can leave me your comment below, it will be well received :)
If you want to receive all the updates of the blog by e-mail just write your email address in the tab of the right column where to subscribe.
If you want to receive all the updates of the blog by e-mail just write your email address in the tab of the right column where to subscribe.
© [2013-2016] [Be brown, be sweet]
No hay comentarios:
Publicar un comentario
Gracias por dejar un comentario, prometo leerlo y contestarlo lo antes posible.
Si no consigues que se publique lo que has escrito, házmelo saber mandándome un mensaje (pestaña de la derecha). El formulario de comentarios a veces da problemas y no quiero dejar de leer tu opinión.